- Glue the three layers of foam together with the contact cement
in the order listed. Place under a board with weight and allow it to set
till the cement is dried as per the directions on the container - overnight
was convenient for me.
- Cut the foam into 3/16 inch 4.5 mm) wide strips with a razor or
with a round-wheel fabric cutter.
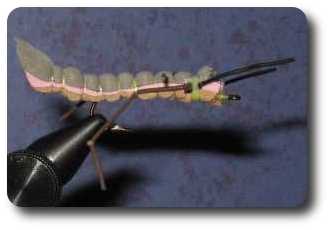
- Cut a piece from one of the strips approximately 1-1/2 inches (38 mm).
With a razor, cut a tapered tail (see photo). Then insert the razor into the bottom (tan)
at the 3/4" (19 mm) point and carefully make a slit all the way to the front,
barely cutting into the middle (pink) layer).
- Cover the hook with the monofilament thread in criss-cross wraps, ending
at the mid-point of the shank.
- Coat the thread wraps with the Bondini cement and slip the body over
the thread.
- Tie the body onto the hook in segments to the front, moving the thread underneath the body.
Then wrap backwards (at the same spots, of course) and continue to the rear
forming segments as you go. Return to tie-in point.
- Take two pieces of Living Rubber approximately 1-1/4 inches (32 mm)
long and tie knots in them, forming the angles for the rear legs.
Tie them in at the tie-in point with the angled leg facing the rear.
Use only enough tension to make the legs angle out from the body.
Move the thread forward to just behind the front segment of the body.
Pull the legs forward and tie them on tightly, forming the right-angled legs.
Move the thread to the just behind the eye of the hook and whip-finish.
Be sure to add a drop of cement on the whip finish (monofilament is slick).
- Using a large needle with a slit cut into the eye to make threading easier,
pull a section of living through the body approximately half-way between
the tie-in points of the legs. Just before reaching the finish,
put a mini-drop of Bondini cement on the rubber and then pull it the rest
of the way. Trim to match front legs.
|