| Hook: | light wire, 12-16 |
| Half Body: | Red floss |
| Hackle: | one cree feather and two cream feathers |
| Wings: | hackle tips of two regular cream hackles |
| Hook: | Std. Dry Fly Hook, downeye | Place Hook in vise. |
| Thread: | Black 8/0 | Start the thread at the hooks eye, and wind a base to midshank. Return the thread to the start point. Leave a tiny spot free at the eye. |
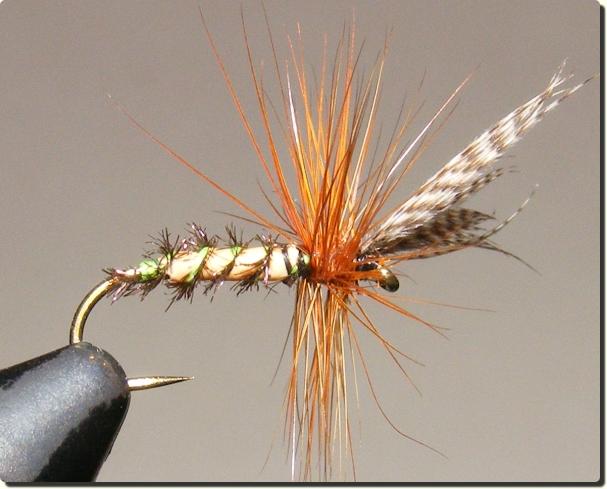
| Wings: | Wood Duck Flank Fibers | Take a bunch of feather fibers and measure them against the hool's length. Tie them in at the hook's eye with the pinch, tips pointing over the eye. Leave only a small gap at the end, just enough for a small head. Using figure-eight wraps divide the fibers into two bunches, but don't bring them into an upright position. We will do this later. Advance the thread to the bend, completing thus the thread base. |
| Rib: | Peacock herl, and yellow thread, twisted | Tie in the herl at the tip, and the thread. Peacock herl is very fragile, especially at the tip. You mostly have to shorten the tip in order to get a more durable portion of the fiber. Advance the thread to the eye. |
| Body: | Natural raffia | Cut a length of raffia, approximately 3 inches, and moisten it with water. Split it into small strips, width depends on the size of the hook. Ensure that the strip is still moisten and tie it in behind the wing, but leave space for the hackle. Wrap the raffia back to the bend and return to the tie-in point. |
| Take the yellow thread, twist it carefully with the peacock herl. To avoid breakage of the peacock, use more tension on the thread and wrap the herl around it. Take one turn behind the body on the bare hook, and than wrap to create the rib. If the herl breaks, you can use the yellow thread to tie in the herl again at the bend, and you have a second chance to do the rib. Tie off the rib and snip off the excess. | ||
| Hackle: | Brown dry fly | Prepare the hackle as usually. Tie in by the steam. Wrap the hackle, and tie off very close by the wing. |
| Head: | Black | Advance the thread into the small gap between wing and eye, grasp the wing with your fingers of the left hand and pull them in a 45 degree. Use the forefinger to separate the two wings. Hold one wing between thumb and forefinger, the other wing is kept from forefinger and middle finger. After setting the wings in an angle of 45 degrees, form a little and, whip and you're done. |